AED 9.45
Description
IR is widely used in the remote control. With this IR receiver, the Arduino project is able to receive a command from any IR remoter controller if you have the right decoder. Well, it will be also easy to make your own IR controller using an IR transmitter.
Features:
- Based on the 38KHz IR Receiver Sensor
- Can be used for remote control
- Apply to a variety of platforms including Arduino/51/AVR/ARM/Pi
Specifications:
- Power Supply : 5V DC
- Current: 3 - 5mA
- Interface : Digital
- Modulated Frequency : 38Khz Carrier IR code
- Transmission distance: 1~8m (Depends on transmit terminal)
- Transmission Angle : 60 Degree
Documents
Dimensional drawing |  |  |
Pinout |  |  |
Schematic |  | |
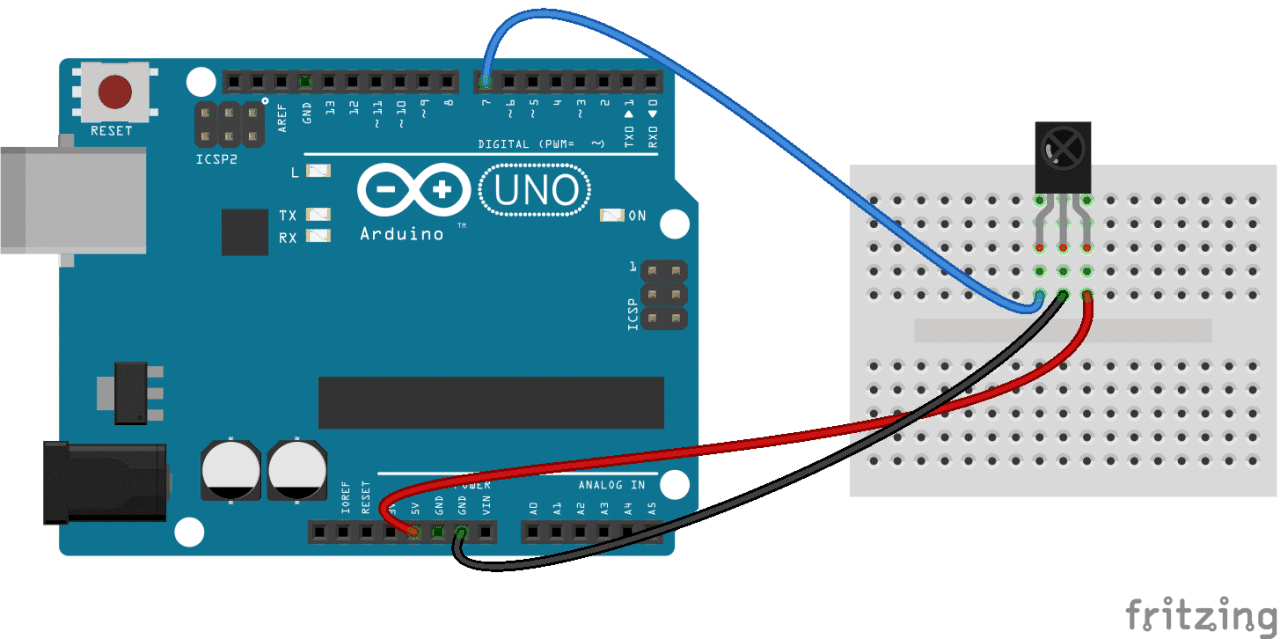
To connect a stand-alone receiver diode, wire it like this:

PROGRAMMING THE IR RECEIVER
Once you have the receiver connected, we can install the Arduino library and start programming. In the examples below, I’ll show you how to find the codes sent by your remote, how to find the IR protocol used by your remote, how to print key presses to the serial monitor or an LCD, and finally, how to control the Arduino’s output pins with a remote.
INSTALL THE IRREMOTE LIBRARY
We’ll be using the IRremote library for all of the code examples below. You can download a ZIP file of the library from here.
To install the library from the ZIP file, open up the Arduino IDE, then go to Sketch > Include Library > Add .ZIP Library, then select the IRremote ZIP file that you downloaded from the link above.
FIND THE CODES FOR YOUR REMOTE
To find the key codes for your remote control, upload this code to your Arduino and open the serial monitor:
Now press each key on your remote and record the hexadecimal code printed for each key press.
FIND THE PROTOCOL USED BY YOUR REMOTE
Knowing which protocol your remote uses can be useful if you want to work on some more advanced projects. Or you might just be curious. The program below will identify the protocol used by your remote. It even works on most remote controls around your house.